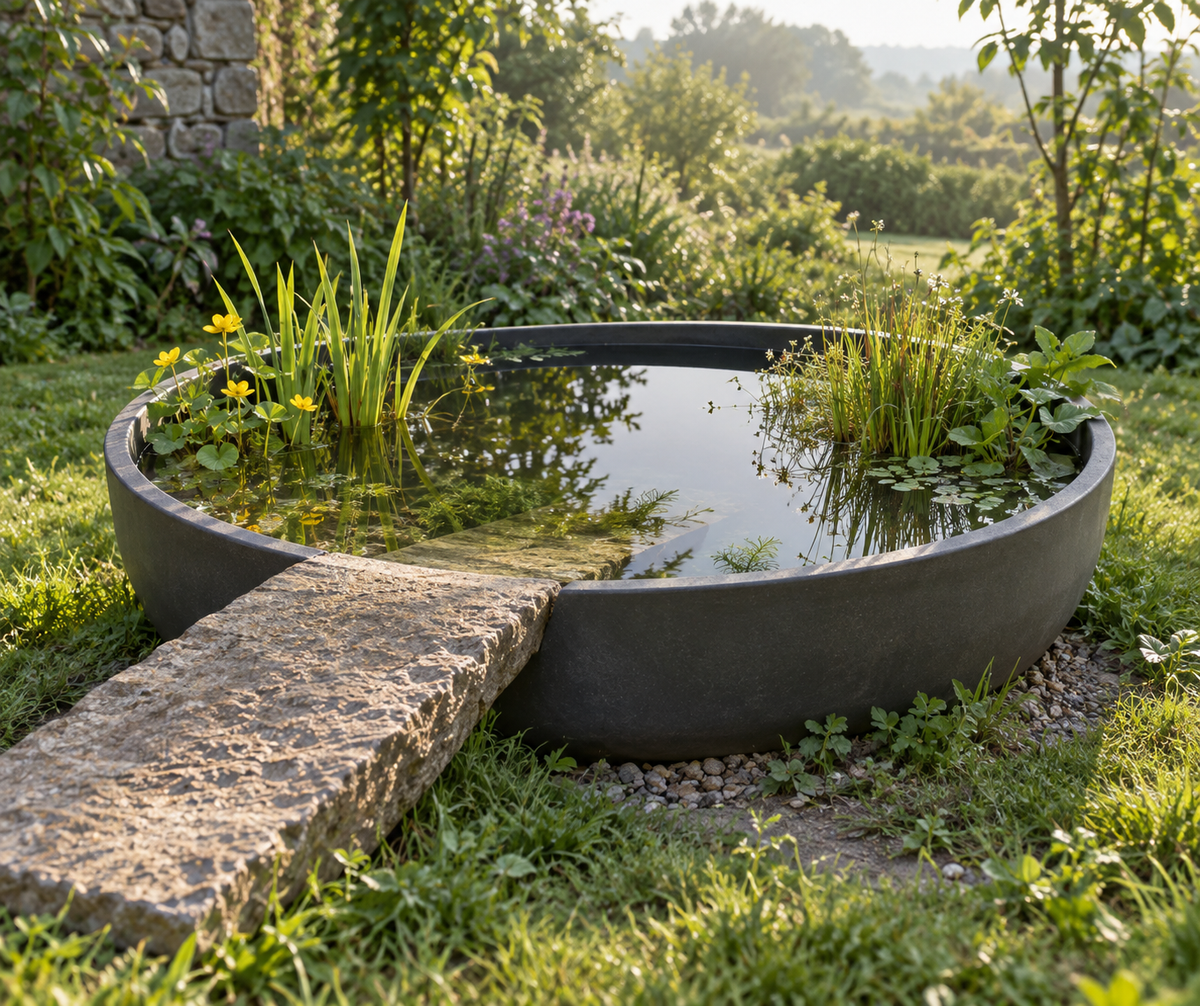
Installing a mini-pond without digging up the lawn is possible with a suitable container, a few plants, and well-thought-out water access. A large tub can host aquatic insects and offer a small living landscape in the garden. Success depends mainly on three choices: a container that can sustainably withstand water pressure, a stable location, and sensible planting.
This container pond works with a limited volume. It warms up, evaporates, and cools down faster than an in-ground pond. It is therefore better to start with a simple project, without fish, and then observe its evolution before adding equipment or plants.

1. Choose a container designed to hold water above ground
A container intended to remain filled outdoors must be watertight, stable, and sufficiently rigid. Check with the manufacturer that it can serve as an above-ground basin and accommodate aquatic plants. A recovery tub of unknown previous use is not a good starting point: paint residues, oil, or household products can compromise the entire project.
Be careful with preformed ponds sold to be buried. Their shape does not mean they are self-supporting. Some require the support of the earth around the walls and under the shelves. Placing them directly on a patio can cause deformation. Choose the container for its actual use, then adapt the decor around it.
One liter of water weighs about one kilogram. Add the weight of the container, baskets, and stones. Even a small installation becomes difficult to move once filled: choose its location before starting and have the capacity of the support checked if it is on an elevated structure.
2. Find a bright and accessible location
Look for a spot that receives light for part of the day, with protection from the hottest hours. Permanent shade limits certain blooms; a small tank exposed all day can undergo significant temperature variations. Observe the sun at several times of day before deciding.
Keep access clear for removing a few leaves, monitoring the level, and maintaining the plants. Avoid the lowest point of an area where soil or fertilizers wash down. Under a tree that sheds many leaves, plan for regular cleaning: a mini-pond quickly becomes loaded with organic matter.
The presence of water also requires a setup compatible with the children and pets in the home. A shallow container remains an accessible water point. Its location and necessary protections should be decided at the design stage, without relying on plants to prevent a fall.
3. Prepare a level and durable base
Place the container on a leveled, resistant support that complies with its instructions. Check that it does not tip over and that its bottom rests as intended by the manufacturer. A poorly leveled slab under a large tub can concentrate the load instead of distributing it.
Clean the container according to the manufacturer's instructions, then rinse it thoroughly. Install the empty baskets and any supports to visualize the heights. The stones must be clean, stable, and suitable for contact with water. Do not stack a fragile column in the middle of the tub to gain a few centimeters.
4. Provide an entry and exit for small wildlife
An above-ground mini-pond can be accessible to flying insects while remaining inaccessible to animals moving on the ground. If you wish to facilitate their passage, both sides of the rim must be addressed: an exterior approach and an exit from the water.
A rough, well-secured, and low-slope ramp can connect to an interior beach or an emergent stone. Test the path with the water level a little lower than usual. A ramp that stops right at the initial fill level becomes unusable once a few centimeters have evaporated.
Avoid high, smooth edges without an escape route. The layout does not guarantee the arrival of amphibians: it mainly serves to reduce the difficulties for an animal that might fall into the tub. Do not take frogs or tadpoles from the wild to speed up the establishment of life.
5. Fill with water from a known source
Rainwater from clean collection can be suitable for a biodiversity pond. However, check the collection path, the condition of the reserve, and the materials it passed through. Water loaded with debris, roofing products, or road runoff is not automatically suitable just because it comes from rain.
If you use tap water, inquire about its quality and relevant precautions for the intended use. Avoid applying a universal treatment recipe. The volume, the presence of animals, and the characteristics of the water change the decision.
Do not add a bucket of water from another pond to "seed" the mini-pond. This transfer can also introduce undesirable organisms or pathogens. Insects and some aquatic life will naturally colonize new water points.
6. Install few plants, at the right depths
Start with a few species adapted to the volume. A marginal plant, a submerged plant, and an area of open water already form an interesting composition. Planting depth is generally measured between the water surface and the crown of the plant, according to its data sheet, and not to the bottom of the basket.
- Water forget-me-not is suitable for a damp or very shallowly submerged edge.
- Aquipond water mint provides vigorous marginal vegetation: a basket makes it easier to control its development.
- Hornwort is a submerged plant without real roots. It is not planted like a marginal perennial.

A suitable planting basket helps maintain certain plants and allows for local intervention. Respect their substrate needs. Avoid enriched horticultural soil dispersed in the water: added nutrients can promote algae.
7. Let the mini-pond function without over-equipping it
A small pond intended for biodiversity can be designed without fish and without mechanical filtration. This does not mean that the water will always remain transparent. Discoloration, a few algae, and seasonal variations are part of the phenomena to observe before intervening.
Plants do not guarantee sufficient oxygenation for fish, especially at night. Adding fish transforms the project: you must re-examine the volume, temperature, filtration, and overwintering. For this type of mini-pond, keeping an installation without fish is often the most coherent solution.
8. Maintain with small interventions
Monitor the water level during dry periods. Remove fallen leaves and vegetation that is decomposing in excess, without cleaning all surfaces. Before thinning out plants, examine them: larvae may be hiding there. Preserve some refuges during each intervention.
A deposit at the bottom does not automatically justify a vacuum or treatment. In this small habitat, general vacuuming can remove useful organisms. If excess matter is a problem, intervene gently on a limited portion, then look for the cause of the accumulation.
In winter, follow the container's resistance limits and the plants' needs. A small tub can freeze much deeper than an in-ground pond. The presence of a layer of ice is therefore not enough to conclude that all organisms have a frost-free refuge.
Prepare your plant selection
Before ordering, note the usable volume, available depth, dimensions of the tub, and its exposure. Send these details along with a photo to the Aquiflor team: they can help choose plants whose development remains compatible with your mini-pond.
Useful sources and readings
- The Wildlife Trusts — Create a mini-pond: container, wildlife access, and precautions during colonization.
- Royal Horticultural Society — Garden water habitats: small water points and biodiversity features.
- Natagora — The pond, even in a small garden: planting and measured maintenance.